Having built and operated the Bed & Breakfast at Smoky Bear Ranch for a couple of years, Scott sensed from our guests there was not only a desire, but a need for stand-alone Cabins in Glacier National Park. Not having any cabins of our own, Scott researched if there were existing cabin owners in our remote area that might be interested in having us market their Glacier Park Cabin rentals on our website (this was back in 1997/1998).
We first hooked up with folks north of us – even more remote than we are – in Polebridge, MT. These rental cabins were rustic cabins – no electricity and no indoor plumbing – and Scott found that people wanted at least the basic comforts of home and very few people were interested in renting a rustic cabin.
In the off-season of 1998, as Scott was browsing around, he met some folks building two small Cabins a couple miles south of us next to Glacier Park. After visiting with them, they were happy to have us help them market their newly built rental cabins. This business relationship worked very well for a couple of years but then they sold their Cabins and we were back to filling a need – a shortage of Glacier Park Cabins.
In the meantime, the property adjacent to ours came on the market for sale. We jumped at the opportunity to purchase this property in anticipation of building our own Cabins. After spending a couple of years cleaning up the newly acquired property, and getting it ready to build on, we started the process of building our first Glacier National Park Cabin!
The Grizzly Cabin
The first cabin we embarked on building was a large vacation home rental cabin. We considered a true log cabin but after learning about all the building and maintenance headaches, we decided on frame construction with half log siding – still achieving a log cabin look. Nancy designed it in AutoCAD with input from Scott to be a 4-bedroom cabin with 2 full bathrooms and a Great Room accompanied by a full kitchen and living room. Because this was going to be a large cabin, we decided to call it the Grizzly Cabin.
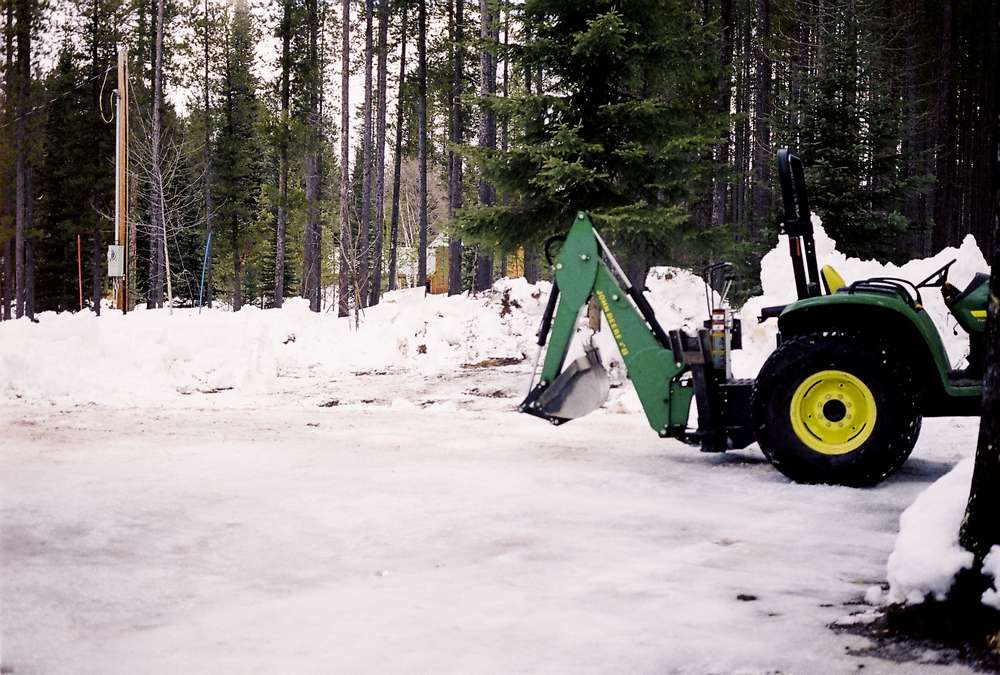
Once we secured a construction loan and located a reliable contractor, we started breaking ground the end of February 2002. Of course, this turned out to be one of the coldest Februarys on record, and we had lofty goals. Once construction started, we created a page for the Grizzly Cabin on our old website making it available for rent starting July 5th of that year.
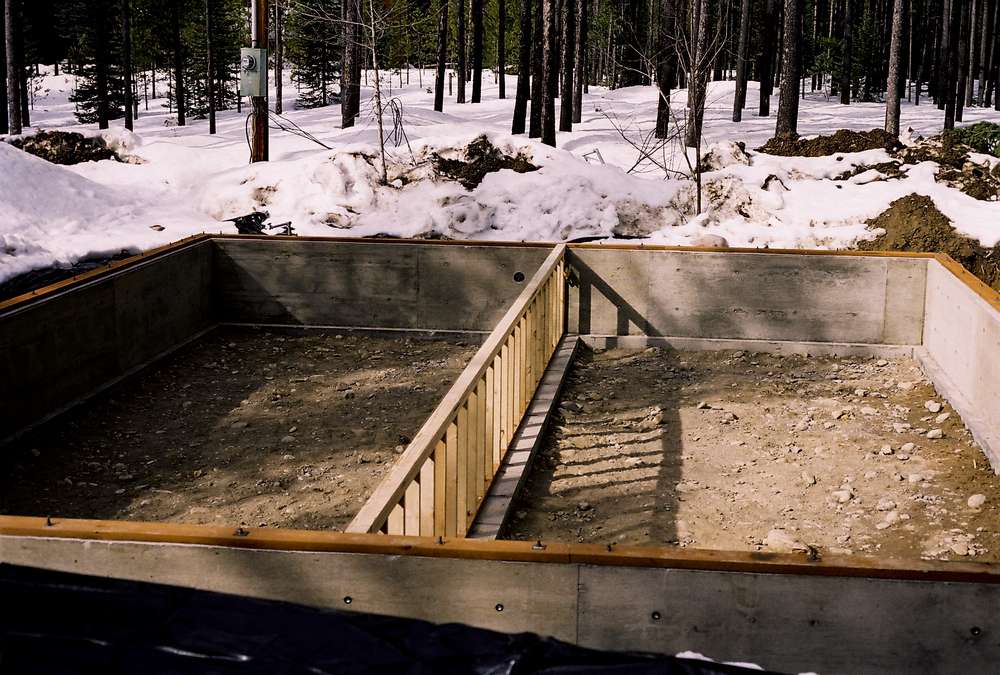
Living in an area where we average 12-15 feet of snow each year, the snow had to be removed off the ground first. Having all that snow on top of the ground turned out to be a blessing in disguise as it kept the ground from freezing too hard in that extra cold year. Ultimately it was easier to dig the hole for the footer and crawl space foundation but because the temperatures were so cold, once the concrete footer and
foundation were poured, it needed to be covered with a tarp, and a diesel heater below to keep it warm enough for the concrete to cure. This process took quite a while given the frigid temperatures.
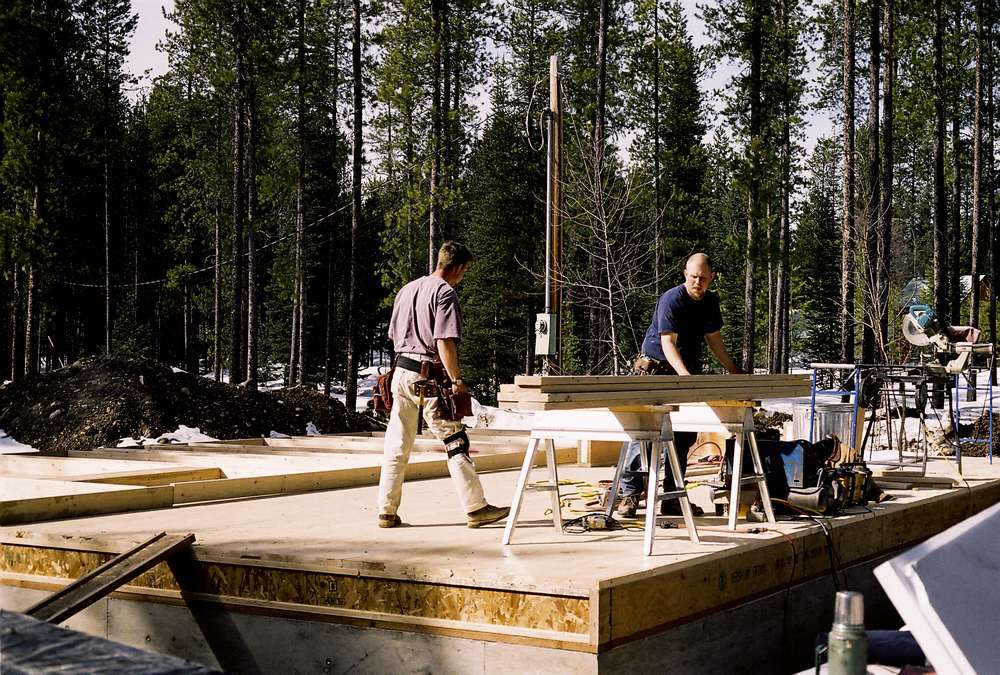
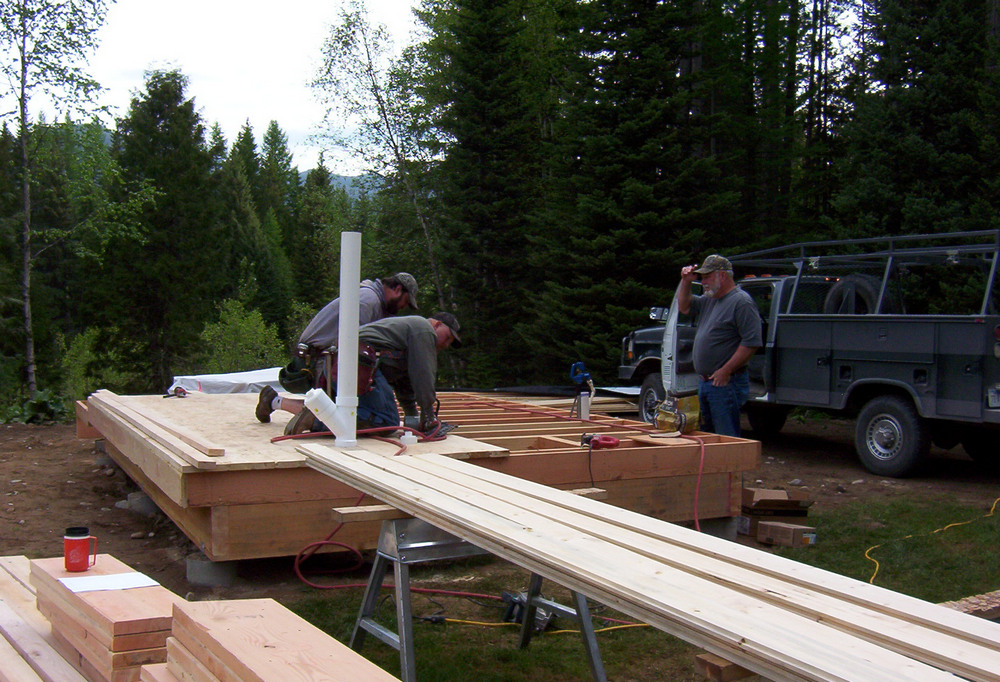
When the first of April arrived, the contractor was ready to start building on the foundation. Beginning with the pony wall in the crawl space, then adding the floor joists and 2×6 knotty pine tongue & groove floor.
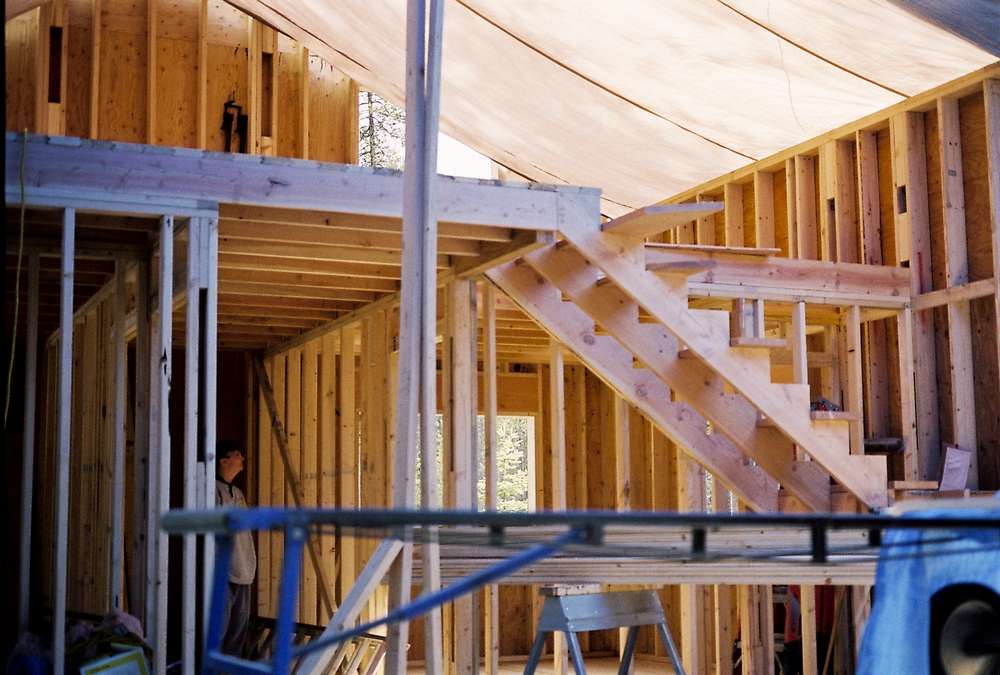
As the walls were added, our first cabin started to take shape. The Grizzly Cabin was built with balloon construction (12-foot-high walls) to make for more head space in the loft bedrooms and an upstairs bathroom. Soon the interior walls were in place, the half loft 2×6 knotty pine tongue & groove floor was added with a stair case to the half loft. The windows and exterior doors were installed and it was starting to look like a real cabin. We were excited about the progress.
Now that the interior walls were complete, oh my, all the finish work that needed to be done and it was already June. The first guests were arriving in less than a month. Nancy was still working full-time but arrangements with her employer to start work early allowed her to have a 2-hour lunch to purchase lighting fixtures, cabinets, plumbing supplies, etc. so that Scott wouldn’t have to take time running around and able to focus on building.
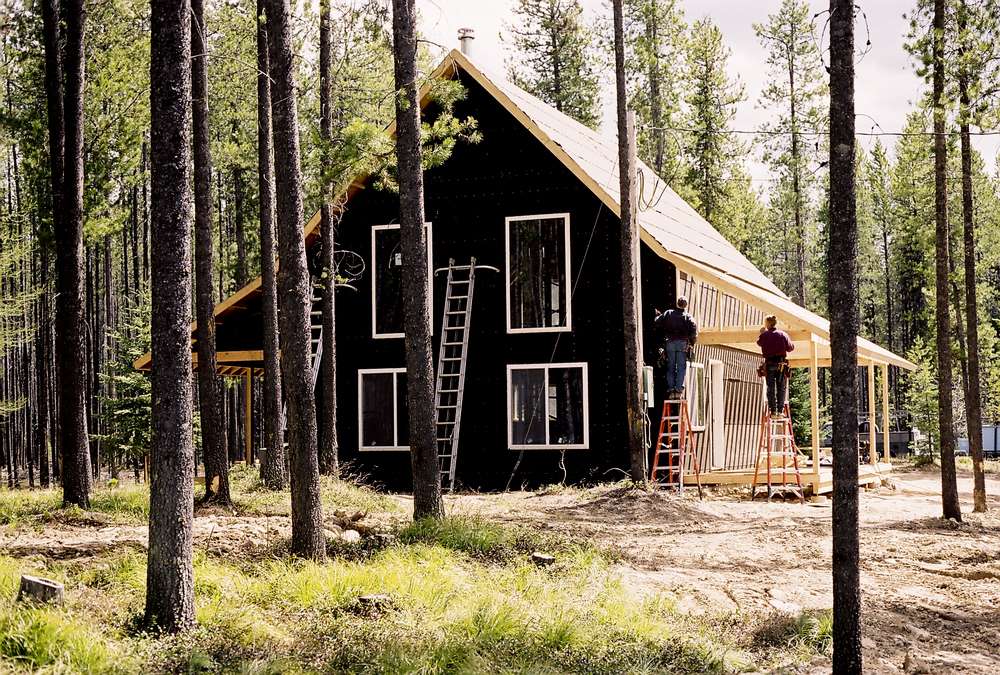
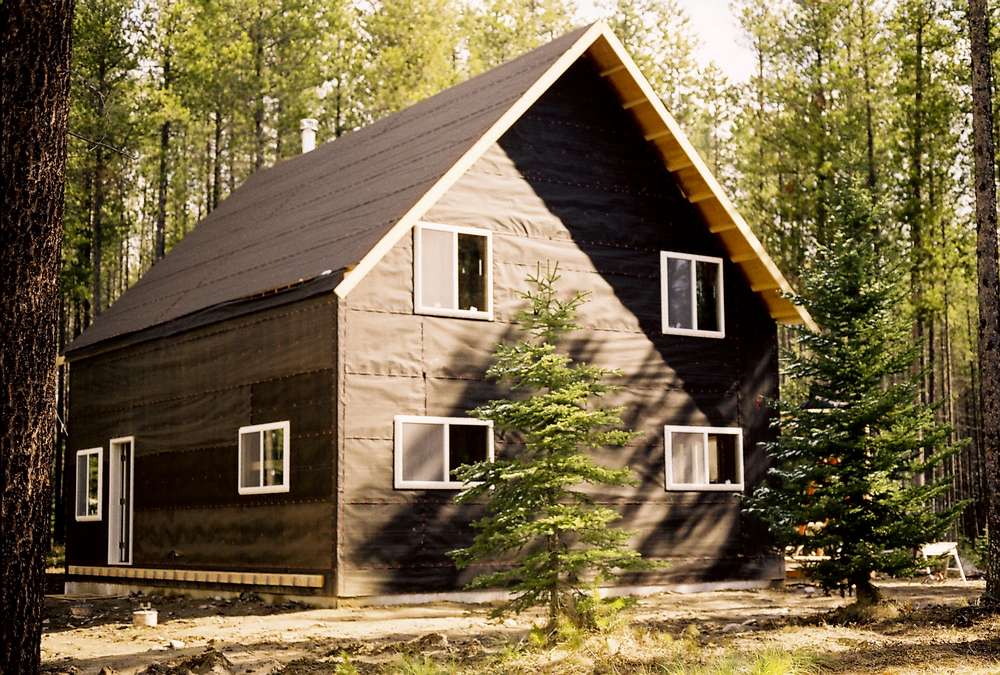
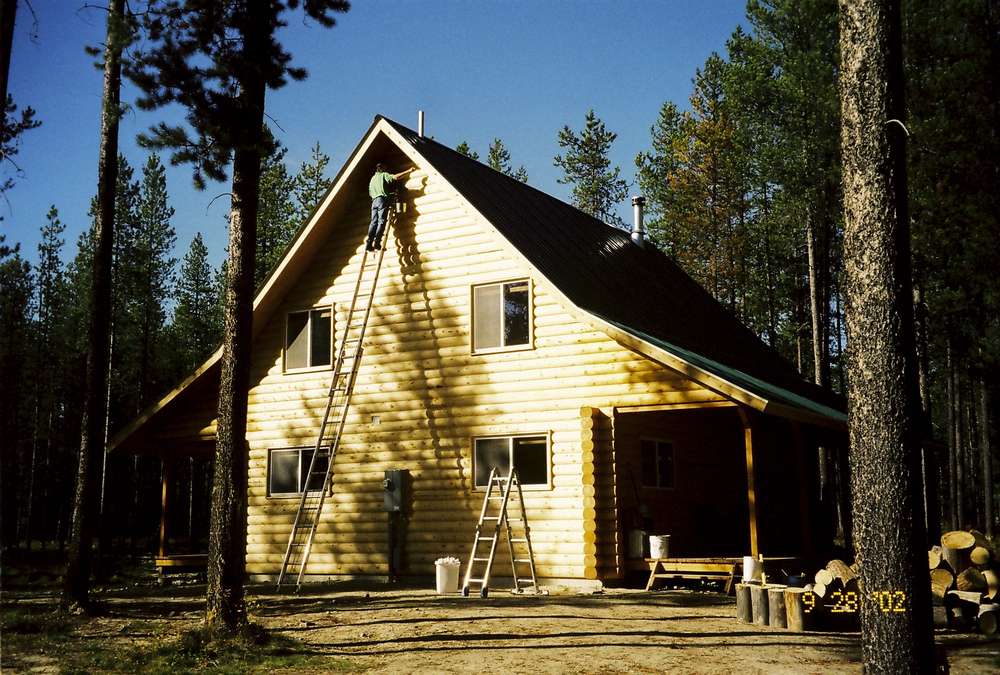
When the contractor moved outside to start installing the half log siding, Scott was busy installing the rest of the plumbing fixtures, lighting fixtures, cabinets, finish around doors and windows, etc. And all those knotty pine interior walls and floors needed a Varathane finish – 3 coats with 12 hours between – and it was now the end of June. We made use of the contractor’s scaffolding to reach the 17-foot-high ceiling in the Great Room.
On July 5th, with the Varathane on the floors cured enough and the cabin cleaned, we started moving furniture in. We stocked the kitchen with microwave, coffee pot, toaster, and other small and large appliances plus all the pots & pans, plates, bowls, cutlery, etc. We made the beds and hung the towels, adding all the finishing touches for the first guests to arrive that afternoon.

What an amazing experience it was building this Cabin to serve Glacier National Park vacationers. The long hours worked, the lack of sleep, the excitement of watching it come together, getting to know a truly fabulous contractor, and the joy of watching the guests enjoy the Grizzly Cabin as we had hoped for. As time has passed, more amenities have been added – rocking chairs & canvas chairs on the porches, outdoor fire pit, horseshoe pit, barbeque grill, picnic table, hammock plus many other additions to make for a more comfortable and enjoyable experience for all our guests.
The Smaller Cabins
With the Grizzly Cabin designed for larger groups, family reunions or families traveling together, we realized there was also a need for smaller cabins – single family accommodations. Back to the drawing board, Nancy started working on designing a smaller cabin in AutoCAD – with Scott’s input of course. What to call this cabin? We have Smoky Bear Lodge and the Grizzly Cabin so keeping with the “bear” theme and being a small cabin we decided to call it the Little Bear Cabin.
You’d have thought after pushing so hard with all those long days and nearly sleepless nights building the Grizzly Cabin, we’d have learned a lesson. But no! Once again, we pushed ourselves to the limits, starting this building project the first of May 2006 and making it available for the first guests to arrive on July 1st. Having built a great relationship with the contractor for the Grizzly Cabin, it was easy choosing a contractor for this project.
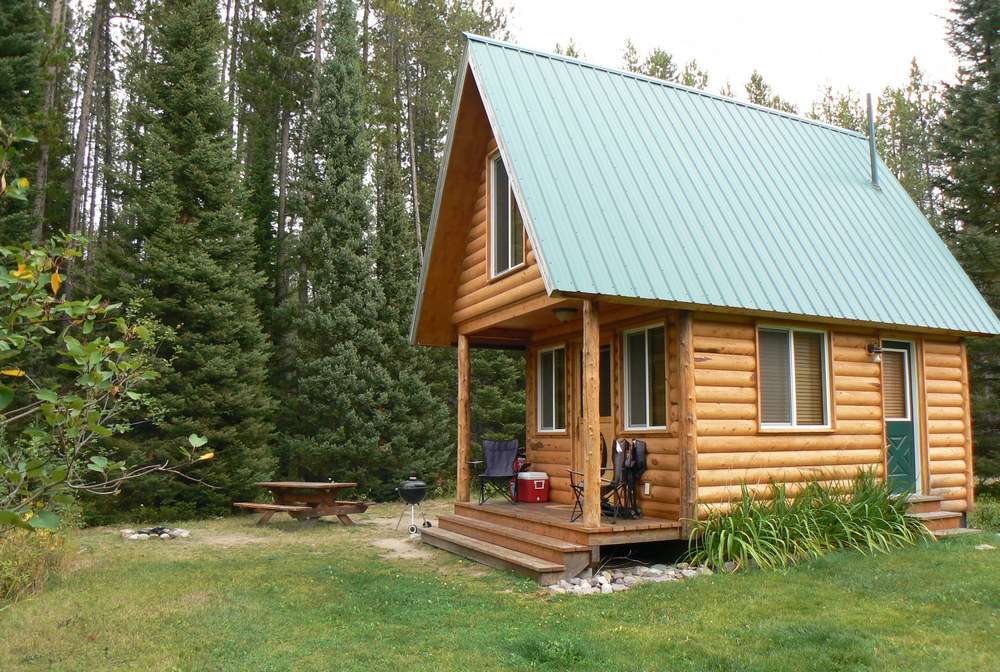
We’d been renting the Grizzly Cabin for 4 years now so we knew there wasn’t much of a demand for Glacier Park Cabins during the winter so we decided to build this cabin as a summer only cabin, but easy to winterize. We wanted it small yet large enough to be a full-service cabin with sleeping for 6. Remember, people want the creature comforts of electricity and indoor plumbing!
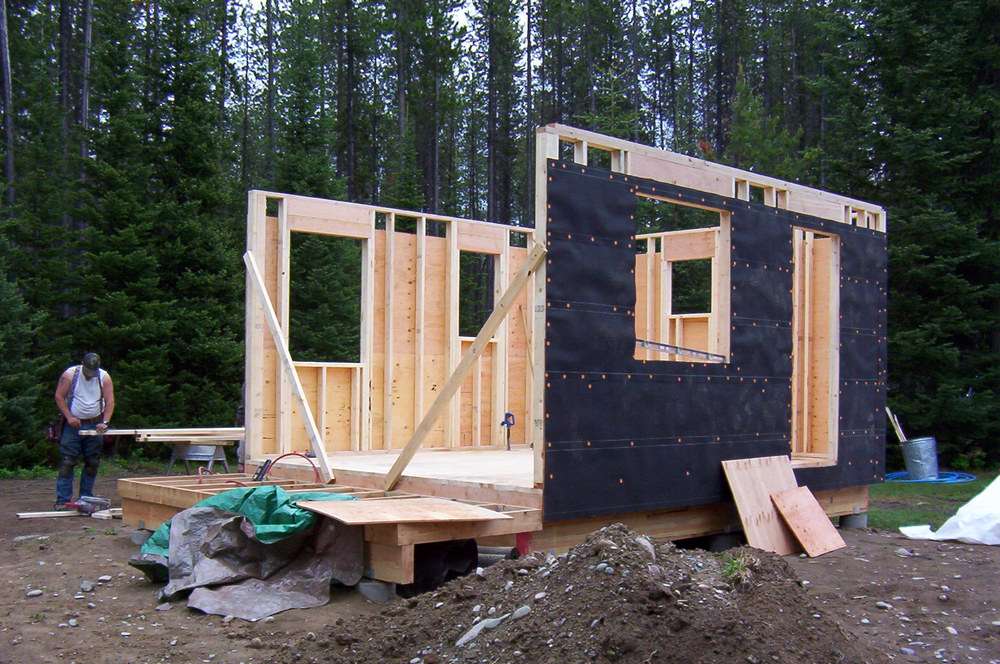
Instead of building it on a foundation, the Little Bear Cabin was built on piers – a 12-foot x 16-foot lower level floor plan with a 4-foot porch overlooking our pond. This floor plan was large enough to accommodate an 8-foot kitchenette, a breakfast nook, a fold out futon along with a bathroom and closet. The kitchenette would be complete with a 3-cubic foot refrigerator, 2 burner stovetop, microwave, sink, as well as cabinets to store the pots & pans, plates, bowls, cutlery, etc.
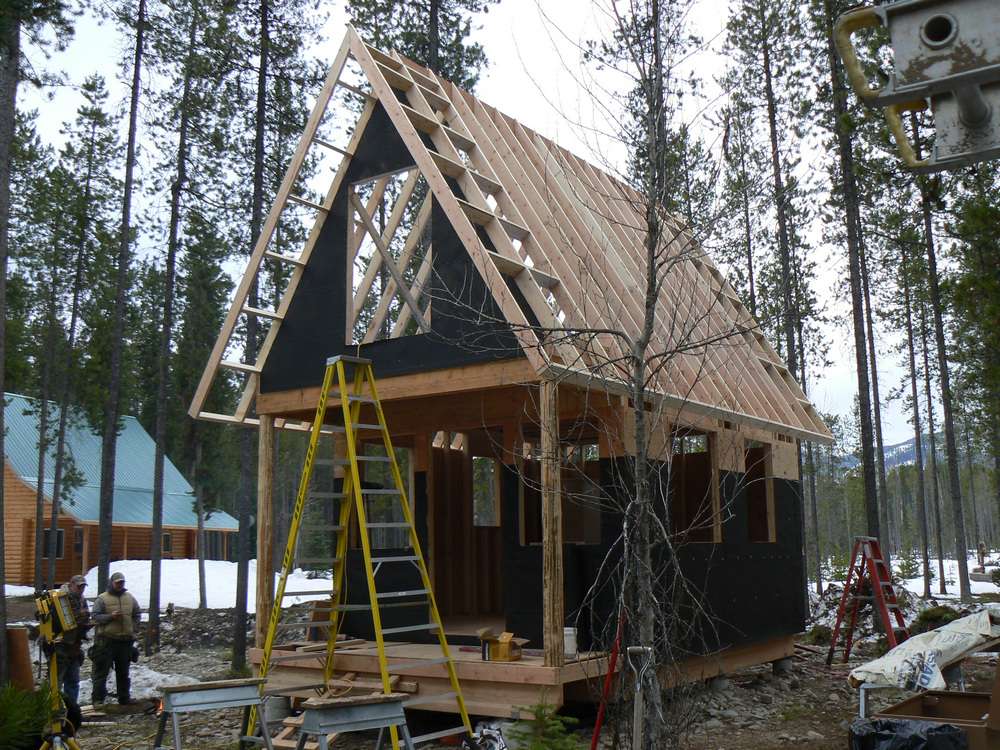
By extending the second level over the porch, the loft has a 12-foot x 20-foot floor plan. We needed to furnish the cabin with a queen bed and 2 twin beds in the loft bedroom therefore this Cabin needed as much head room as possible. Plus, the loft access opening wasn’t large enough to move any size bed through it therefore the windows in the loft needed to be large enough to handle this. To accommodate these requirements, instead of the recommended 6/12 pitch for the roof, this cabin has a 20/12 pitch roof.
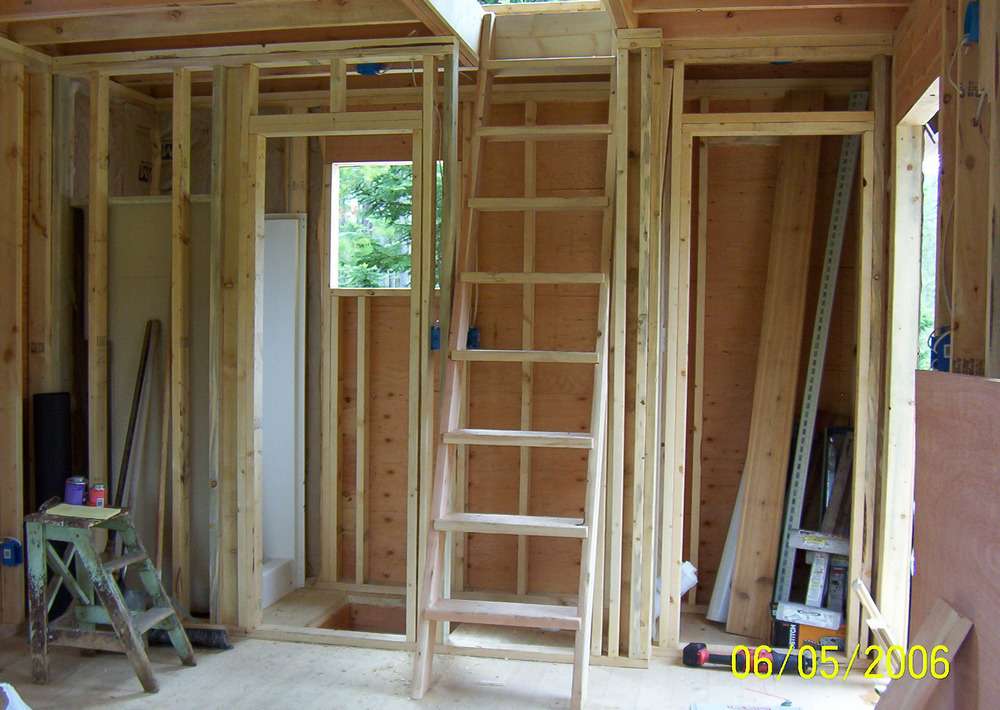
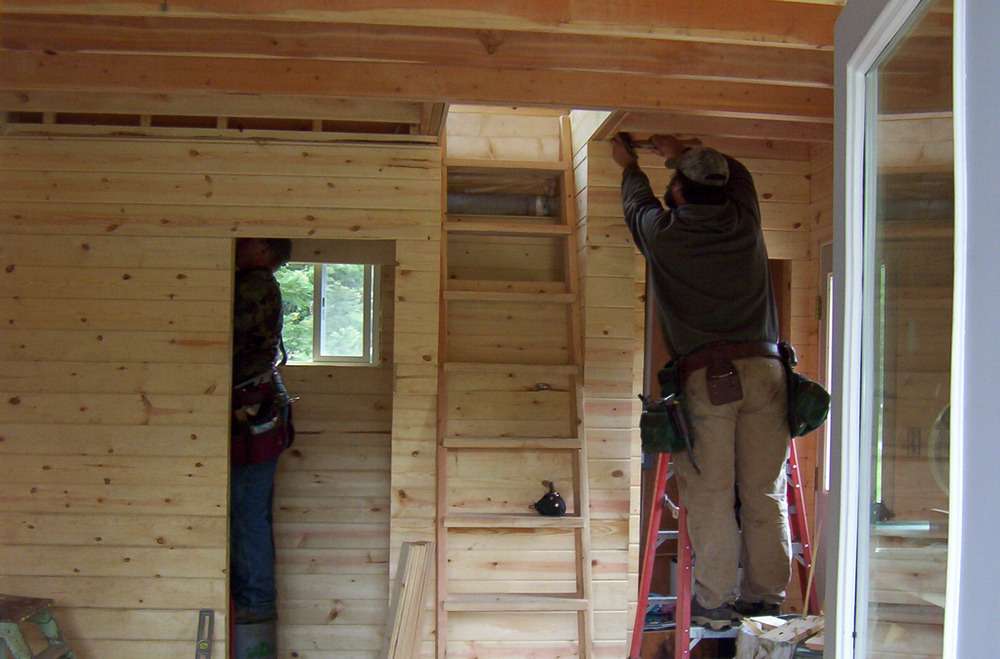
There wasn’t enough room for a regular staircase in this small footprint so ladder stairs were designed to access the loft bedroom. These stairs are steep enough extending above the toilet so they don’t take up much of the footprint but with regular size steps for easy footing. With Scott’s log rails under the steps, it’s quite easy to navigate these stairs.
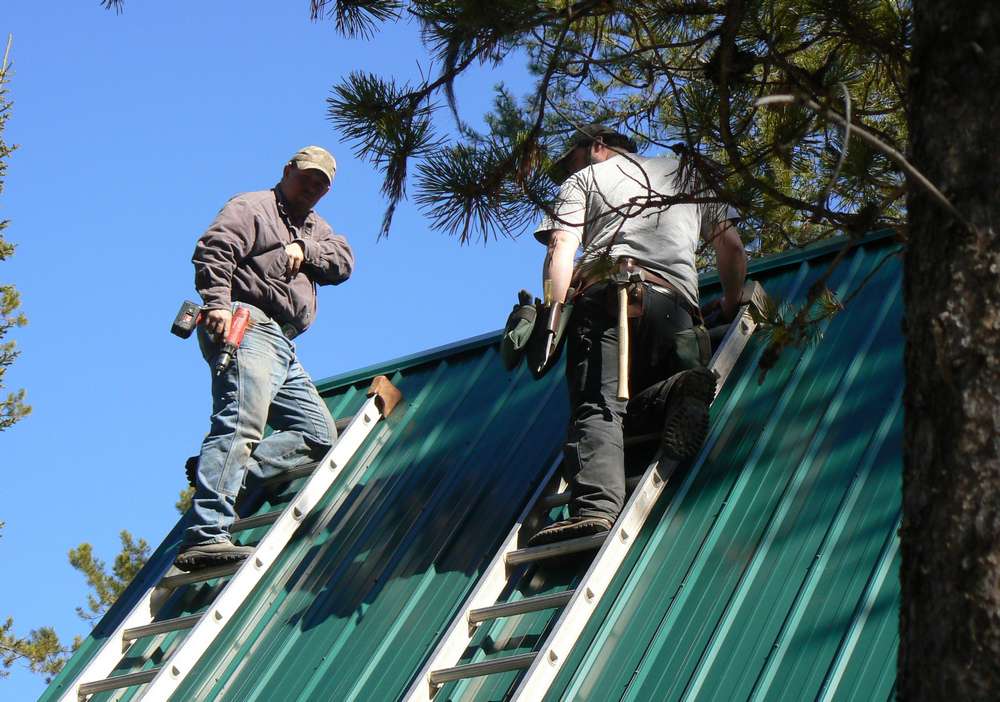
Once the contractor had the walls up with the steep roof, Scott went to work on installing the electrical wiring and plumbing elements to make this a full service Glacier Park Cabin. We liked the look of the 2×6 knotty pine tongue & grove flooring in the Grizzly Cabin so did the same in the Little Bear Cabin. The 1×6 knotty pine tongue & grove paneling was so stunning in the Grizzly Cabin we decided to use it in the Little Bear Cabin as well. And we loved the look of the half log siding on the Grizzly Cabin so sided the Little Bear Cabin with it also.
With the contractor’s portion of the interior complete, now came the finish work. Scott finished installing the electrical and plumbing fixtures, finishing around the doors and windows, and putting Varathane on the walls and floors. When the Varathane cured, we worked together to install the cabinets and breakfast nook. And while pushing to finish this cabin, we were simultaneously planning our son’s wedding on our front lawn for June 24th.
On July 1st with the Little Bear Cabin clean, we moved in furniture, all the kitchenette amenities, made the beds, hung the towels, and added all the finishing touches to make it ready for the first guests.
Because there was definitely a need for more small Glacier National Park Cabins, in 2007 we built a second small cabin with the same design as the Little Bear Cabin. This time we gave ourselves and the contractor more time starting it in late February to be ready for rent the first of June.
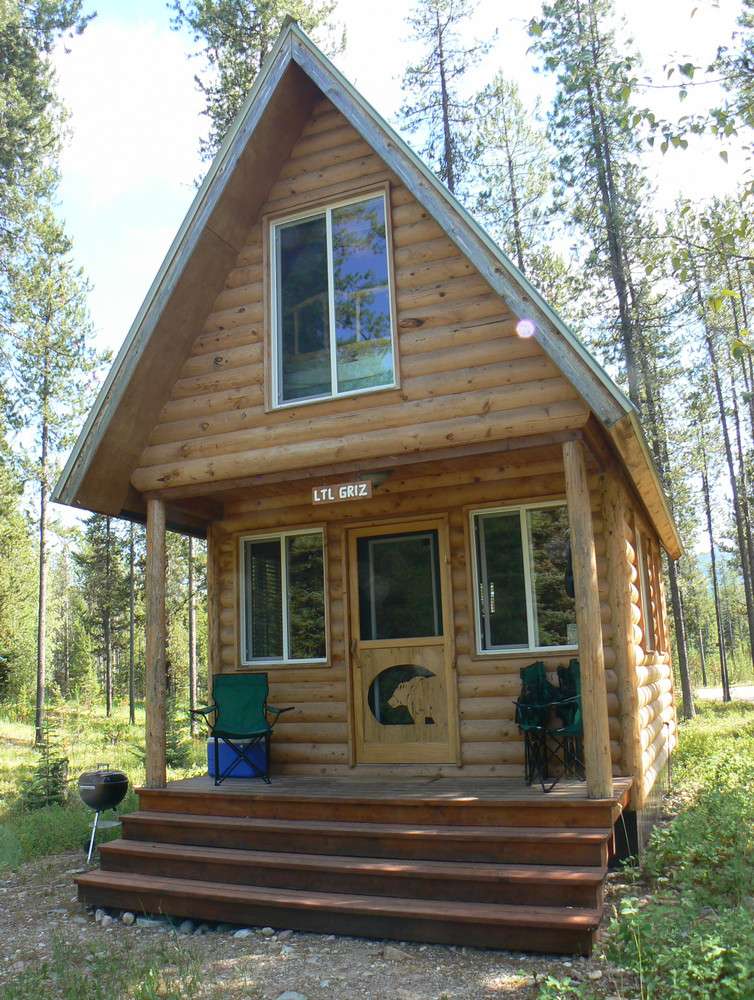
Now we needed a name for our second smaller cabin, something to help us distinguish it from the Little Bear Cabin when taking bookings. Initially, for marketing purposes, we just called both of them the Little Bear Cabins and then eventually referred to the second one as the Little Griz Cabin given it was built on the same lot at the Grizzly Cabin, and the name stuck.
And so we now have three Cabins at Smoky Bear Ranch next to Glacier National Park, The Grizzly Cabin, The Little Bear Cabin, and The Little Griz Cabin. We planned the location of the cabins on our properties to give our guests ultimate privacy. Each cabin is furnished with it’s own outside fire ring, barbeque grill, picnic table, and porch chairs. Each of the cabins has a guest book that we thoroughly enjoy reading, people frequently express their good times, adventures, and love of the cabins.